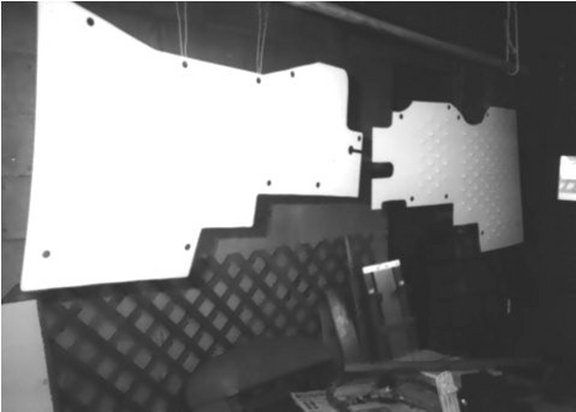
Since the bodywork on this truck isn't finished, I'll be adding to this page as it progresses. The body on this truck is in relatively good shape, meaning I have all the sheet metal, and none of it is beyond repair. Finding a Power Wagon with good sheet metal was important because of the lack of good sheet metal that is available. As far as I know, there is no one manufacturing replacement fenders, or bed parts for the Power Wagon. Dennis Sherman, at Power Wagons Parts does make floor panels, bumpers and running boards. I bought the floor panels and running boards because the quality was so good. They match the originals, down to the diamond shaped dimples, and are made from heavy 16 gauge steel. I also ended up buying two front fenders from Dennis because they were available at a good price, and solid around the top braces, unlike the originals (see photo in disassembly).
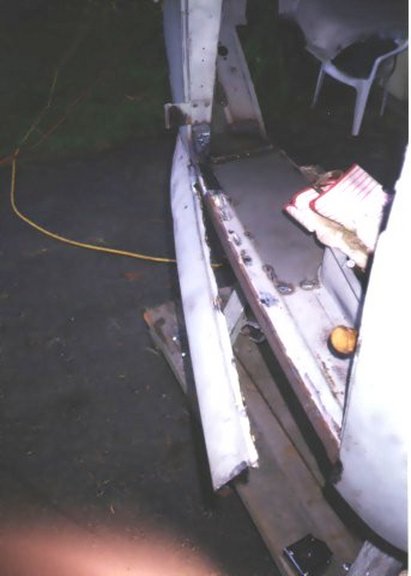
The cab of the truck is in great shape, with the exception of the floor where it meets the rocker panels. The entire cab was sandblasted, making it much easier to weld and paint. A pattern was made of the cab floor, then I cut the 16 gauge sheet metal using a jig saw. The metal was welded onto the floor using a MIG welder. The driver side rocker panel was also removed, it held on with brazing in about five spots. The rocker panel was straightened, and then welded back into place. The only other welding on the cab was on the dashboard. Holes from the plow controls were welded closed and ground smooth, with the 4 1/2" Makita grinder. I also thought the truck would look better without the padded dash that came on the 1968 Power Wagon. I like the clean look of the earlier trucks, so I left the pad off and welded the holes shut.
Then it was "pick and file" time to take out as many pucks and dings as I could find. (Unfortunately, I found some more after I painted the cab. ) Then I filled whatever I could with Dyna-lite, and sanded that smooth. After blowing off the dust, cleaning the body with PPG Acryli-clean and then a tack rag, I was ready to start spraying primer. I used PPG DP50 Epoxy Primer with DP 402 catalyst. This primer is great over bare metal, but needs to be coated within 7 days. I used PPG PRIMA K36 Acrylic Urethane primer surfacer over that. K36 covers well, and must be sanded with 360 grit, and then wet sanded with 400 grit. My logic in going to this much trouble to paint the Power Wagon, is that if I do it right, this paint job should last many years.
Rather than keep the original color, Angus Black, I picked another Dodge Power Wagon color from 1968 - Pine Green (also known as Ponchartrain Green), PPG # DAR2220. I'm using PPG DELSTAR Acrylic Enamel with DELTHANE ULTRA (DXR 80). I'm using these products based on the recommendation of the autobody supply store, and I'm pleased with the way that it's coming out. I'm using an HVLP (high volume low pressure) spray gun from Accuspray, that is attached to an Accuspray turbine. It has worked well for me, only one run on the cab.
The cab was set back on the frame using the original cab mounts, and aligned using the hole in the transmission cover (yes I painted that too), centered around the transmission tower as a guide. I connected the wiring harness next and ran it into the cab. I cleaned and painted the gauges, speedometer, heater, and steering column before reinstalling them in the cab. The steering wheel was in decent shape, but cracked. I decided to fix the cracks, and thought it would be easier to remove the steering wheel. BIG mistake! There were no pulling holes on the wheel, so I drilled and tapped a couple 1/4"-20 holes, used a wheel puller, nothing moved, stripped the holes. Tried two more holes, same result. Not being smart enough to stop there, I threaded the shaft nut on, supported the wheel and hit it lightly (at first) with a hammer. Now I had peened over threads and a big chunk of plastic missing from the wheel. The net result was a new steering wheel. Expensive mistake.

I put the gauges, speedometer, heater, and knobs, back in the cab and connected all the wires. Unfortunately when I stepped on the brake pedal the dash lights came on. And I thought the wires were marked right when I took them out. It took another day with a wiring diagram to get everything working correctly. The only thing I haven't tested are the reverse lights. The '68 had reverse lights that are controlled from a switch mounted on the driver side of the transmission. The lights sit in the tailpiece under the tailgate. The radiator shell was attached, and the grill was put back on.
Update Feb. 22, 1997. Well after trying to "adjust" the drivers door without much luck, I finally determined why the door sticks. When I removed the rocker panel under the door, I decided to align the bottom edge of the rocker panel with the bottom of the cab rear corner net to the rocker. Now I realize why the rocker was about a 1/4" lower. By lifting up the panel, it looks like I also lifted the top edge of the rocker panel enough to prevent the driver's door from closing easily because the bottom of the door is now hitting the side of the rocker panel instead of sitting on top. Always fit the doors to the cab before you paint - another lesson learned! Looks like its back to more grinding and welding - stay tuned...
Update March, 1997. One month later the driver's door is almost adjusted. Dennis and I worked for about 2 hours adjusting and forming the hinges, and door metal to get a proper fit. What's really strange is that the lines in the door don't match up with the lines on the cab. I have to check this out with some other 68 WM300 to see if it's just this truck, or if this is how it rolled off the assembly line. Another problem is that the door latch is riding to high above the striker. Which explains why the previous owner had an eye hook screwed into the door that attached to an eye at the base of the seat. We're going to try to machine a better striker to solve the locking problem.